Control Panel: Sound, Mail, and Programs and Features
Contents
Control Panel: Sound, Mail, and Programs and Features#
The Control Panel remains a central hub for configuring and tailoring various system settings and features in the Windows operating system. In this article, we’ll explore three critical sections of the Control Panel: Sound, Mail, and Programs and Features. Each of these sections holds significant importance in managing audio settings, email accounts, and installed software programs on a Windows computer.
Sound#
The Sound section in the Control Panel enables users to control and customize audio settings for their computer, including playback and recording devices, system sounds, and communication settings.
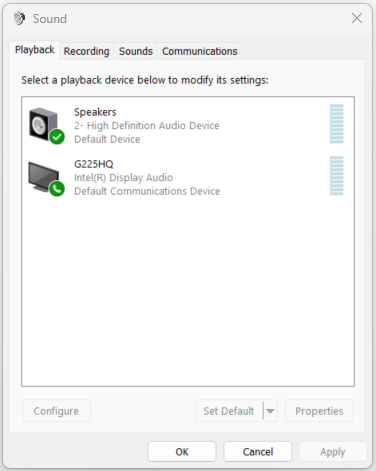
Playback Devices#
Within the Playback tab of the Sound section, users can manage audio playback devices such as speakers and headphones. Users can set the default playback device, adjust volume levels, and configure other playback-related settings.
Sample Use Case: Changing Default Playback Device
Steps to Configure:
Open the Control Panel.
Click on “Sound” to access the audio settings.
In the “Playback” tab, right-click on the desired playback device (e.g., Speakers or Headphones).
Select “Set as Default Device” from the context menu.
Adjust volume levels and other playback settings as needed.
Recording Devices#
The Recording tab allows users to manage audio recording devices such as microphones. Users can choose the default recording device, configure microphone levels, and enable or disable microphone enhancements.
Sample Use Case: Adjusting Microphone Levels
Steps to Configure:
Access the Control Panel.
Navigate to the “Sound” section.
Click on the “Recording” tab.
Right-click on the desired recording device (e.g., Microphone) and select “Properties.”
Go to the “Levels” tab to adjust microphone levels using the slider.
Click “Apply” and then “OK” to save the changes.
System Sounds#
The Sounds tab lets users customize system sounds for various events, such as notifications, alerts, and shutdown sounds. Users can choose from a list of predefined sounds or even assign their own sound files.
Sample Use Case: Changing Notification Sound
Steps to Configure:
Open the Control Panel.
Click on “Sound” to access audio settings.
Go to the “Sounds” tab.
Scroll through the list of sound events and select the event you want to change (e.g., “New Mail Notification”).
Choose a different sound from the dropdown list.
Click “Apply” to confirm the change.
Mail#
The Mail section within the Control Panel allows users to configure and manage email accounts associated with Microsoft Outlook or other email clients.
Email Accounts#
In the Email Accounts tab, users can add, modify, or remove email accounts configured in Microsoft Outlook. This section provides options for setting up email servers, specifying server settings, and managing email synchronization.
Sample Use Case: Adding a New Email Account
Steps to Configure:
Open the Control Panel.
Navigate to “Mail.”
Click on “Email Accounts.”
Select “New” to add a new email account.
Choose the account type (e.g., Microsoft Exchange, POP3, IMAP) and follow the prompts to enter account details.
Configure incoming and outgoing server settings.
Complete the setup and test the account.
Data Files#
The Data Files tab allows users to manage and control data files associated with email accounts. Users can add, remove, and set default data files for storing emails, contacts, and other Outlook data.
Sample Use Case: Adding a New Data File
Steps to Configure:
Access the Control Panel.
Click on “Mail.”
Go to the “Data Files” tab.
Click “Add” to create a new data file.
Choose the file type (e.g., Outlook Data File, Exchange OST).
Select the location where you want to save the data file.
Provide a file name and complete the setup.
Programs and Features#
The Programs and Features section of the Control Panel allows users to manage and modify installed software programs on their computer. Users can uninstall programs, change program settings, and view installed updates.
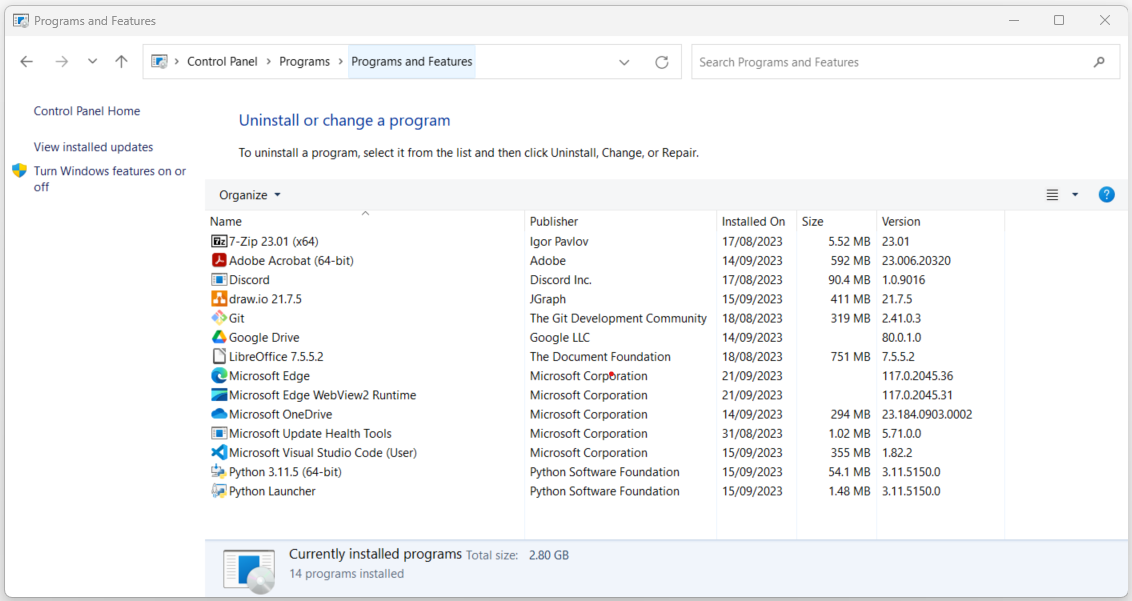
Uninstall or Change a Program#
Within the Programs and Features tab, users can view a list of installed programs and choose to uninstall or modify them. This section is particularly useful for freeing up disk space and maintaining an organized system.
Sample Use Case: Uninstalling a Program
Steps to Configure:
Open the Control Panel.
Navigate to “Programs and Features.”
Scroll through the list of installed programs.
Select the program you want to uninstall.
Click “Uninstall” from the top menu.
Follow the uninstallation wizard prompts to complete the process.
Installed Updates#
The Installed Updates link in the Programs and Features section allows users to view a list of installed Windows updates and software updates. This is essential for monitoring system updates and troubleshooting issues caused by specific updates.
Sample Use Case: Checking Installed Updates
Steps to Configure:
Access the Control Panel.
Click on “Programs and Features.”
From the left-hand menu, click on “View installed updates.”
Scroll through the list of installed updates to review recent changes.
Final Words#
The Sound, Mail, and Programs and Features sections of the Control Panel provide users with essential tools to manage audio settings, configure email accounts, and oversee installed software programs. By delving into these sections, users can personalize audio playback and recording preferences, manage their email accounts effectively, and maintain an organized collection of installed programs. These features collectively contribute to enhancing user productivity, ensuring a smooth audio experience, and streamlining the management of software resources on a Windows computer.