Managing and Configuring Users and Groups in Windows
Contents
Managing and Configuring Users and Groups in Windows#
Managing users and groups is a fundamental aspect of administering a Windows-based computer system. In this article, we will explore the concepts and procedures involved in managing and configuring users and groups in the Windows operating system.
Introduction to Users and Groups#
Before delving into the specifics of managing and configuring users and groups, it is important to understand what these entities are and why they are crucial in a Windows environment.
Users: Users are individuals who interact with a computer system. Each user has their own set of permissions, settings, and preferences that dictate how they can use the system. User accounts are created to allow individuals to log in, access resources, and perform tasks on a Windows machine.
Groups: Groups are collections of user accounts. Instead of assigning permissions and settings to each user individually, you can group users together and manage their permissions collectively. This simplifies the process of granting or revoking access to resources. Groups can also be nested within other groups, creating a hierarchical structure.
User and Group Management in Windows#
User and group management in Windows can be performed using various tools and interfaces, including the graphical user interface (GUI) and the command-line interface (CLI). Below, we will discuss both methods.
Graphical User Interface (GUI)#
1. Control Panel#
User Accounts: To manage user accounts via the Control Panel, you can navigate to the “User Accounts” section. Here, you can create, modify, or delete user accounts, change user passwords, and configure account types.
2. Computer Management#
Local Users and Groups: In the Computer Management console, you can find the “Local Users and Groups” section. Here, you can manage both user accounts and groups. You can create new users, reset passwords, and add or remove users from groups.
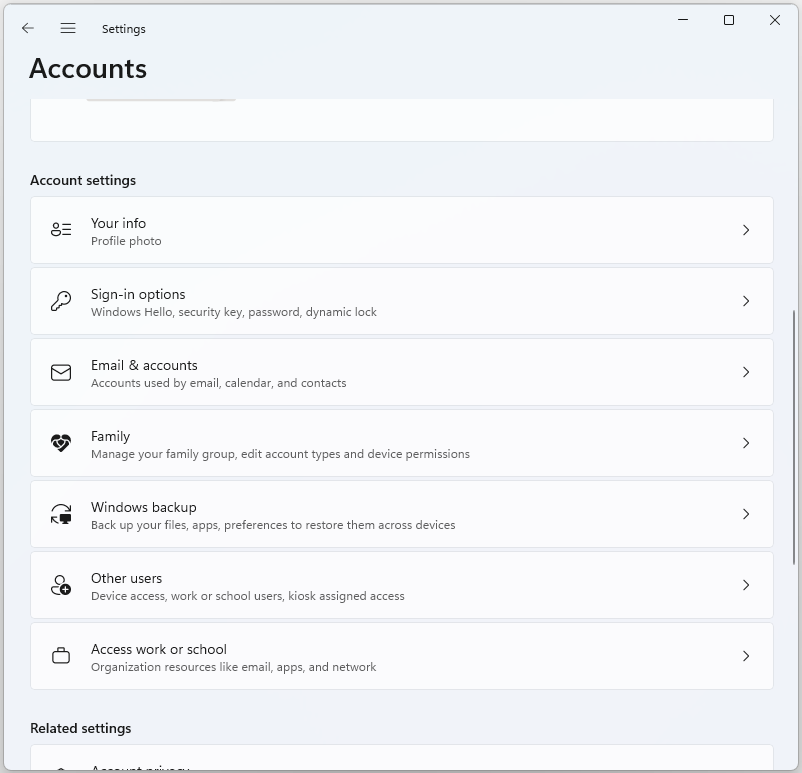
3. Settings App#
Accounts: On Windows 10 and later versions, you can access user account settings through the Settings app. This allows you to manage accounts, family settings, and sign-in options.
Command-Line Interface (CLI)#
1. Command Prompt#
net user: Thenet usercommand is used to manage user accounts from the Command Prompt. You can create new user accounts, change passwords, and perform other user-related tasks.net user username password /add
net group: Thenet groupcommand allows you to manage groups. You can create new groups, add users to groups, and view group memberships.net group GroupName /add
2. PowerShell#
PowerShell provides even more advanced capabilities for managing users and groups. For instance, you can create scripts to automate user provisioning and group management tasks.
New-LocalUser -Name "Username" -Password "Password" -FullName "Full Name"
Add-LocalGroupMember -Group "GroupName" -Member "Username"
User Account Operations#
Creating User Accounts#
Creating user accounts in Windows is a straightforward process, whether you use the GUI or CLI. When creating a user account, you typically need to specify the username, password, and other optional details such as the full name or description.
Using the GUI#
Navigate to the Control Panel or Computer Management.
Select “User Accounts” or “Local Users and Groups.”
Choose the “Create a new user” option.
Follow the prompts to enter the user’s information and set a password.
Using the CLI (Command Prompt)#
net user username password /add
Using PowerShell#
New-LocalUser -Name "Username" -Password "Password" -FullName "Full Name"
Modifying User Accounts#
You may need to modify user accounts for various reasons, such as changing passwords, updating user information, or altering group memberships.
Using the GUI#
Navigate to the Control Panel or Computer Management.
Access “User Accounts” or “Local Users and Groups.”
Select the user account you wish to modify.
Choose the appropriate option to change settings like password or group memberships.
Using the CLI (Command Prompt):#
net user username newpassword
Using PowerShell:#
Set-LocalUser -Name "Username" -Password "NewPassword"
Deleting User Accounts#
When a user account is no longer needed, you can delete it to free up resources and ensure security.
Using the GUI:#
Navigate to the Control Panel or Computer Management.
Access “User Accounts” or “Local Users and Groups.”
Select the user account you want to delete.
Choose the “Delete” option.
Using the CLI (Command Prompt)#
net user username /delete
Using PowerShell:#
Remove-LocalUser -Name "Username"
Group Operations#
Groups help streamline user management by allowing you to apply permissions and settings to multiple users at once. Here’s how you can work with groups in Windows.
Creating Groups#
Creating groups is essential for organizing users and applying common settings to them.
Using the GUI#
Navigate to the Control Panel or Computer Management.
Access “Local Users and Groups.”
Right-click on “Groups” and select “New Group.”
Specify the group name and description.
Using the CLI (Command Prompt)#
net group GroupName /add
Using PowerShell#
New-LocalGroup -Name "GroupName" -Description "Description"
Adding Users to Groups#
Once you’ve created a group, you can add users to it to grant them specific permissions or access.
Using the GUI#
Navigate to the Control Panel or Computer Management.
Access “Local Users and Groups.”
Open the group you want to add users to.
Select the “Add” button and specify the users to add.
Using the CLI (Command Prompt)#
net group GroupName username /add
Using PowerShell#
Add-LocalGroupMember -Group "GroupName" -Member "Username"
Viewing Group Memberships#
To see which users belong to a particular group, you can check the group’s memberships.
Using the GUI#
Navigate to the Control Panel or Computer Management.
Access “Local Users and Groups.”
Open the group you want to view.
You can see the list of members in the group properties.
Using the CLI (Command Prompt)#
net group GroupName
Using PowerShell#
Get-LocalGroupMember -Group "GroupName"
Deleting Groups#
When a group is no longer needed, you can delete it. Note that this action does not delete the user accounts within the group.
Using the GUI#
Navigate to the Control Panel or Computer Management.
Access “Local Users and Groups.”
Right-click on the group you want to delete and choose “Delete.”
Using the CLI (Command Prompt)#
net group GroupName /delete
Using PowerShell#
Remove-LocalGroup -Name "GroupName"
Importance of User and Group Management#
Efficient user and group management is essential for several reasons:
Security: Properly configured user accounts and groups help maintain the security of your system. By assigning appropriate permissions, you can ensure that users only have access to the resources they need.
Resource Management: Managing users and groups allows you to allocate resources effectively. For example, you can limit the amount of disk space a user can use or control access to sensitive files.
Simplifies Administration: Grouping users with similar roles or responsibilities simplifies administrative tasks. Instead of modifying settings for each user individually, you can make changes at the group level.
Audit Trails: User and group management also plays a vital role in auditing. When you need to track who has accessed or modified certain resources, well-organized user accounts and group memberships provide valuable information.
Compliance: Many industries and organizations have compliance requirements that mandate secure user and group management. Adhering to these standards is crucial for legal and regulatory reasons.
Final Words#
Managing and configuring users and groups in Windows is a fundamental aspect of system administration. It allows for efficient resource allocation, enhances security, simplifies administration, aids in auditing, and ensures compliance with industry standards. By understanding and effectively utilizing the tools and techniques available for user and group management, administrators can maintain a well-organized and secure Windows environment.