Processing the Contents of a Forensic Image on Linux
Contents
Processing the Contents of a Forensic Image on Linux#
In the previous blog post we saw how a forensic image can be mounted on Linux. Typically, forensic investigations are time bound and forensic images carry a lot of data. We can use powerful Linux commands to quickly gather information about the files/directories on a forensic image. In this blog post, we will see how find command can be used to process the contents of a forensic image.
Using find command for Digital Forensics#
A forensic image of a target computer’s hard disk is acquired with the intention of gathering information about recently modified files/directories, confirm the existence of suspicious files or malicious scripts or to look for deleted data.
Every file on a Linux computer has metadata like:
a designated type
extension
size
We will utilize the find command to extract files/directories on the forensic image according to the specified metadata.
The forensic image linux_machine.dd was acquired from a Linux computer,

And mounted on user spark’s computer at /mnt/part1.

For the remainder of this blog post, user spark is within the /mnt/part1 directory. All the commands have been issued with root user permissions to ensure access to all the contents of the forensic image.
Finding files/directories based on Type#
In this section, we will see how find command can be used to identify files based on their type, using the following syntax:
find [directory-to-search-within] -type [type]
Here, we will specify [directory-to-search-within] as /mnt/part1. Since user spark is currently within this directory, it is represented with a dot. The [type] parameter contains a single letter indicating which file type to look for within the specified directory.
d: finds all directories
f: finds all files
l: finds all symbolic links
b: finds all block device files
c: finds all character device files
p: finds all pipe files
From the following screenshot, we can see how find has been used to print all the directories on the forensic image.
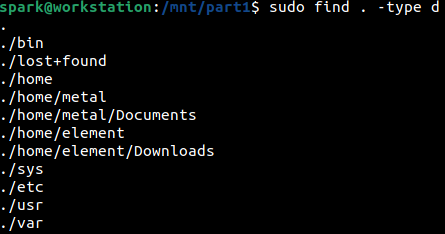
We can see that within /home there are two sub-directories, one for user metal and another for user element. This indicates that there are two users on the computer from which this forensic image was taken from.
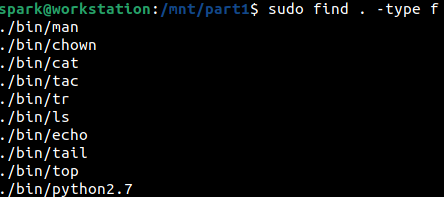
In the following screenshot, we can see how find command has been used to identify all the regular files within the forensic image. The output shown below has been truncated – it will be a very long listing. It would be a good idea to save this output within a file.
Finding files/directories based on Extension#
The following screenshot shows how find is used to find all the csv files within the mounted forensic image. The -name option and its argument *.csv indicates to search across all the file names in the forensic image and only return results whose file names end with csv extension.

Next, we can see how a search for all zip files is performed within user element’s /home directory. There are two zip files.

Finding files/directories based on Permissions#
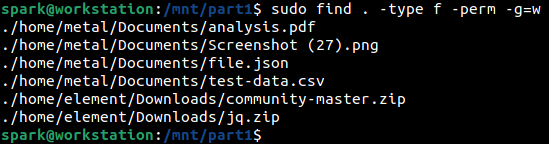
From the following screenshot, we can see how find has been used to print all files, for which all members of a group can write to. -perm option and its argument is used to specify the specify the permissions to look for.
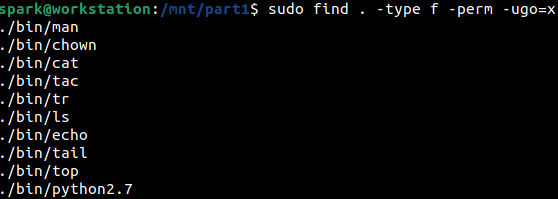
The numerical representation of the permission string can also be passed to -perm. This is a great technique to identify scripts on the forensic image. You can look for files with executable permissions set on them. The following screenshot shows how find has been used to identify all the files with executable permissions x set on them - the permission must be set for the user u, group that has access to the binary g and others o.
Finding files/directories based on Timestamps#
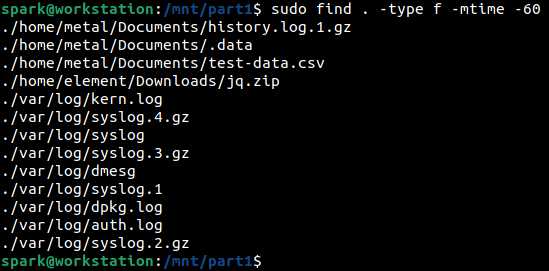
find command can be used to identify files/directories that were modified within the last n number of days using the syntax:
find [directory-to-search] -type [type] -mtime -n
The following screenshot shows the list of files modified within the last 60 days, that are present in the forensic image.
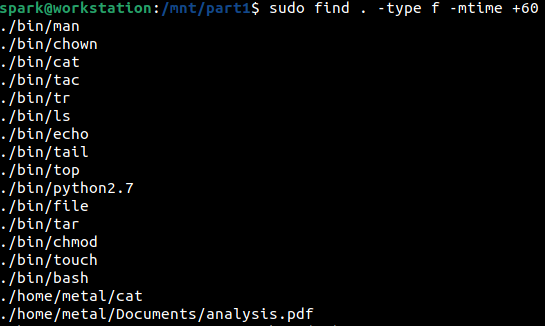
To find files/directories that were modified any time before the last n days, the following syntax can be used:
find [directory-to-search] -type [type] -mtime +n
The following screenshot shows the list of files modified sometime before the last 60 days, that are present in the forensic image.
Likewise, it is possible to also identify files that were accessed (using find option -atime) or had their metadata modified (using find option -ctime) within the last n days or anytime before the last n days.
It is also possible to find files/directories that were modified or accessed or had their metadata updated anytime over the past few minutes, using -mmin, -amin and -cmin respectively.
Searching for a specific string#
Assume you want to search for the existence of a specific string across all the files in the forensic image. It is possible with find and grep.
The following screenshot shows how find and grep have been used to find all files containing the word docker in the forensic image.

It looks like the string has been found in one file belonging to user metal and across some log files. This could indicate the possibility of user metal using docker on the machine.
Now let’s break down this complex command:
find . -type f -exec grep -l “docker” {} \;
This search is performed within the current directory /mnt/part1
type findicates that the search must be performed across all files in the forensic image-exec {} \;indicates that the command specified after the exec option must be executed, which isgrepin this case. The string {} is replaced with the name of every file identified byfind.grep -l “docker”indicates to search for the keyword docker and print the names of the files in which this keyword is found
What next?#
In this blog post, we saw how the find command can be used to quickly process the files in a forensic image. Even images taken from a Windows or Mac computer can be processed this way in Linux.
Project Idea#
Here is a project idea for you:
Use a Linux computer or set up a Linux virtual machine
Copy some files and folders to a USB drive
Take a forensic image of the USB drive
Mount the forensic image in Linux
Identify all the hidden files and directories, in the forensic image
Identify all the empty files and directories, in the forensic image
Identify all files of size greater than 10 MB, in the forensic image
Identify all files that have been modified within the last week, in the forensic image
Identify all files that have been modified within the last hour, in the forensic image
Congratulations! Now you know how to use a Linux computer to acquire a forensic image, mount it and process its contents.